Mastering the Art of Griddling on Your Gas Grill
Let’s dive into griddling on your gas grill. The short answer is yes, you absolutely can turn your gas grill into a fantastic griddle. It’s a versatile way to expand your outdoor cooking repertoire, letting you cook things you wouldn’t normally consider for a grill, from pancakes to smash burgers.
Why Griddle on a Gas Grill?
Griddling on your gas grill offers a unique set of advantages that traditional grilling or indoor stovetop cooking can’t always match.
Expanded Culinary Horizons
Imagine whipping up a full breakfast spread outdoors, complete with crispy bacon, fluffy pancakes, and perfectly seared eggs. Or picture a restaurant-quality smash burger with that incredible crust, cooked right on your patio. Griddling opens up a whole new world of dishes that are challenging or impossible to achieve directly on grill grates. Think delicate fish, stir-fries, quesadillas, and even grilled cheese sandwiches – all with that outdoor ambiance.
Superior Searing and Crust Development
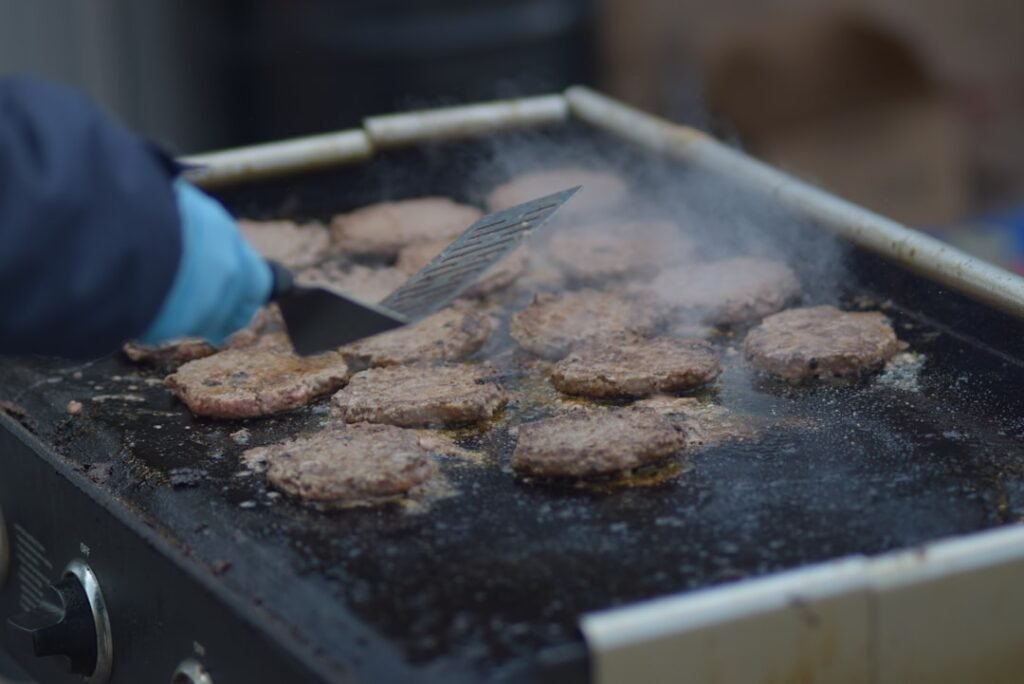
The flat, even surface of a griddle is a master at developing a beautiful, flavorful crust, often referred to as the Maillard reaction. This is particularly noticeable with meats like steak, burgers, or chicken, where that all-important sear locks in juices and adds incredible depth of flavor and texture that you just can’t get from open flame grilling alone.
Enhanced Moisture Retention
Unlike open-flame grilling where fats and juices drip away, griddling keeps them contained, essentially allowing foods to cook in their own flavorful juices. This often results in moister, more tender finished products, especially for items like chicken breasts or even vegetables.
Easier Cleanup (Sometimes)
While it might seem counterintuitive, cleanup can often be simpler with a griddle, especially if you’re cooking greasy foods. All the mess is contained on the griddle surface itself, rather than dripping down into the grill’s internals. A good scrape and wipe-down after cooking usually does the trick, minimizing flare-ups and accumulated grease inside your grill.
If you’re looking to enhance your outdoor cooking experience, you might find it helpful to read about the benefits of using a griddle on a gas grill. This versatile cooking method allows you to prepare a variety of dishes, from pancakes to stir-fries, all while enjoying the great outdoors. For a detailed review of a gas grill that pairs perfectly with a griddle, check out this article on the 24025BMT Gas Grill. It provides insights into its features and performance, making it a great choice for any grilling enthusiast.
Essential Griddling Equipment
To get started griddling, you’ll need a few key pieces of equipment. Don’t worry, it’s not overly complicated or expensive to get going.
The Griddle Plate Itself
This is obviously the most crucial item. There are a few different types to consider, each with its pros and cons.
Cast Iron Griddles
- Pros: Excellent heat retention and even heat distribution. Develops a fantastic non-stick surface over time with proper seasoning. Durable and long-lasting. Relatively inexpensive.
- Cons: Heavy. Requires regular seasoning and maintenance to prevent rust. Takes longer to heat up.
- Best For: All-around griddling, especially smash burgers, steaks, and anything requiring a good sear.
Carbon Steel Griddles
- Pros: Lighter than cast iron, heats up faster, and also seasons beautifully over time to become naturally non-stick. Very durable.
- Cons: Can be more expensive than cast iron. Also requires seasoning and care to prevent rust.
- Best For: Similar uses to cast iron, often favored by chefs for its quick response to temperature changes.
Stainless Steel Griddles
- Pros: Easy to clean, doesn’t rust, and generally requires less maintenance than cast iron or carbon steel.
- Cons: Less effective at heat retention and distribution compared to cast iron/carbon steel, which can lead to hot spots. Often more expensive.
- Best For: Lighter cooking, vegetables, pancakes, or for those who prioritize low maintenance.
Aluminum Griddles (often non-stick coated)
- Pros: Very lightweight, heats up extremely fast. Non-stick coatings make cleanup a breeze.
- Cons: Poor heat retention, coatings can scratch and degrade over time, limiting lifespan. Not suitable for high-heat searing.
- Best For: Pancakes, eggs, delicate items, or for beginners looking for an easy entry point.
Griddle Tools and Accessories
Beyond the griddle plate, a few basic tools will make your griddling experience much smoother.
Spatulas
- Types: You’ll want sturdy, flat-edged spatulas. A few different sizes are helpful. One wider spatula for flipping larger items like pancakes or fish, and one or two smaller, more flexible ones for scraping and maneuvering.
- Material: Stainless steel is the most common and durable. Offset spatulas are great for getting under food easily.
Scrapers
- Purpose: Essential for cleaning the griddle surface during and after cooking. Helps to remove stuck-on bits and grease.
- Material: Stainless steel or a stiff plastic/nylon scraper.
Oil Squeeze Bottles
- Why: Allows for precise and even application of cooking oil. Prevents over-oiling and messy pours.
- Content: Fill with a high smoke point oil like avocado, grapeseed, or canola oil.
Metal Dome or Basting Cover
- Use: Traps steam and heat, helping food cook through faster, melt cheese on burgers, or steam vegetables.
- Material: Stainless steel.
Paper Towels or Clean Rags
- For: Wiping down the griddle, applying oil, and general cleanup.
Setting Up Your Gas Grill for Griddling
Converting your gas grill for griddling is straightforward, but a few considerations will ensure optimal performance.
Placement of the Griddle
- Even Heat Distribution: Ideally, your griddle plate should cover as many burners as possible. If your griddle is smaller than your grill surface, center it over the hottest part of your grill, usually the middle burners.
- Ventilation: Ensure there’s still some space around the griddle for heat and smoke to escape. Avoid completely sealing off the grill interior, as this can affect combustion and airflow.
Managing Heat Zones
One of the great advantages of a gas grill is the ability to create different heat zones. This is incredibly useful for griddling.
Direct Heat Zone
- How: Turn on one or two burners to medium-high under a section of your griddle. This is your searing zone, perfect for achieving that crust.
- Use: Searing meats, getting a hard sear on vegetables, or quickly cooking items that need high heat.
Indirect Heat Zone
- How: Turn off the burners directly under another section of your griddle, or set them to low.
- Use: Holding cooked food warm, slowly cooking delicate items like eggs, or gently toasting buns without burning.
Preheating the Griddle
Proper preheating is critical for successful griddling, especially with cast iron or carbon steel.
Low and Slow Start
- Why: Starting on low heat and gradually increasing it allows the griddle to heat evenly across its entire surface. This prevents hot spots and cold spots that can cause uneven cooking.
- Time: Depending on the thickness of your griddle and grill power, this could take 10-20 minutes.
Temperature Check
- Water Test: A common way to check for sufficient heat is to flick a few drops of water onto the griddle. If it immediately sizzles and evaporates, it’s getting there. If it beads up and dances around, it’s hot enough. If it just sits there, it’s not hot enough.
- Oil Shimmer: Another indicator is when you add a thin layer of oil; it should shimmer but not smoke immediately.
Mastering Griddling Techniques
With your equipment ready and heat managed, let’s talk about some core techniques to elevate your griddling game.
Oiling the Griddle
This might seem basic, but proper oiling is crucial for preventing sticking and achieving that beautiful crust.
High Smoke Point Oils
- Examples: Avocado oil (very high smoke point), grapeseed oil, canola oil, vegetable oil. Avoid olive oil for high-heat griddling as it has a lower smoke point and can burn, creating off-flavors.
- Application: Use a squeeze bottle for an even, thin layer. A paper towel can also be used to spread the oil thinly after it’s applied. You want just enough to coat the surface, not pool.
Re-Oiling as Needed
- When: For multiple batches of food, especially if cooking something that releases a lot of moisture or fat.
- How: Scrape away any residue, wipe clean if necessary, and apply a fresh thin layer of oil.
Flipping and Turning Food
Don’t be afraid to use your spatulas!
The Push and Flip
- Technique: Use one spatula to push the food onto the other spatula for a clean lift and flip. This prevents food from breaking apart.
- Confidence: A quick, confident flip is often better than a slow, hesitant one, especially for delicate items.
Scraping the Surface
- During Cooking: Use a griddle scraper to remove any stuck-on bits or residue between cooking different items or batches. This keeps your surface clean and prevents new food from sticking to old debris.
- Immediate Clean-Up: A quick scrape down after removing food can make final cleaning much easier.
Pressing for the Perfect Sear
This technique is a game-changer for items like smash burgers, bacon, and even some vegetables.
Burger Press or Heavy Spatula
- Method: Place your burger patty on the hot griddle, then immediately press down firmly with a burger press or a sturdy metal spatula, holding for about 10-15 seconds.
- Why It Works: This maximizes contact between the meat and the hot griddle surface, creating an incredible crust (the Maillard reaction) and ensuring even cooking.
Bacon and Other Meats
- Flatter Cook: Pressing bacon helps it cook flatter and more evenly, resulting in crispier strips without curling.
- Chicken Thighs: Pressing skin-on chicken thighs can also help render fat and create a crispier skin.
Cleaning and Maintenance
Proper cleaning is essential for the longevity of your griddle plate and to prevent sticking.
Post-Cook Scrape
- While Hot (but not scorching): After removing food, while the griddle is still warm, use your heavy-duty scraper to remove all food debris and excess oil. This is much easier when the griddle is warm.
- Water Deglaze (Optional): For stubborn bits, a little water poured onto a warm griddle can help loosen debris. Scrape immediately. Be careful with large amounts of water on very hot cast iron, as thermal shock can cause cracking.
Wipe Down
- Paper Towels/Rag: Use paper towels or a clean rag to wipe the griddle clean. For cast iron or carbon steel, a thin layer of oil can be applied while still warm to season and protect from rust.
- Soap (Sparingly): For cast iron and carbon steel, avoid harsh soaps as they can strip seasoning. If you must use soap, do so sparingly and immediately re-season. For stainless steel or non-stick, soap and water are fine.
Storage
- Dry: Always ensure your griddle is completely dry before storing, especially cast iron and carbon steel, to prevent rust.
- Protected: Store in a dry place. For cast iron/carbon steel, a very thin layer of oil can protect it during storage.
If you’re looking to enhance your outdoor cooking experience, you might want to explore the benefits of using a griddle on a gas grill. This versatile cooking method allows for even heat distribution and the ability to prepare a variety of dishes, from pancakes to stir-fries. For more insights on outdoor cooking equipment, check out this informative article on an adjustable swivel campfire grill that can complement your grilling setup. You can read it here: adjustable swivel campfire grill review.
Popular Griddled Dishes
Now for the fun part – what to cook! The possibilities are vast, but here are some popular crowd-pleasers.
Breakfast Staples
Griddles shine for breakfast foods, offering perfectly even cooking and browning.
Pancakes and Waffles
- Technique: Medium-low heat. Oil lightly. Pour batter, wait for bubbles to form and edges to set, then flip once.
- Tip: Don’t overcrowd the griddle.
Bacon and Sausage
- Technique: Medium heat. Lay bacon flat, press gently with a weight or spatula if desired. Cook until desired crispiness. For sausage patties, cook until browned and cooked through.
- Tip: The rendered fat from bacon can be used to cook other items like eggs or potatoes.
Eggs (Scrambled, Fried, Omelets)
- Technique: Low to medium-low heat. Lightly oil the griddle. For fried eggs, crack directly onto the griddle. For scrambled, pour and stir gently.
- Tip: Use a metal dome to steam eggs for faster cooking or to melt cheese on top.
Lunch & Dinner Favorites
The griddle isn’t just for breakfast; it’s a versatile tool for lunch and dinner too.
Smash Burgers
- Technique: High heat. Place a loosely formed ball of ground beef on the griddle, smash immediately with a burger press or sturdy spatula for 10-15 seconds. Season, cook until a crust forms, then flip, top with cheese, and cook until done.
- Tip: Don’t overwork the meat. Use 80/20 ground beef for best results.
Philly Cheesesteaks / Chopped Cheese
- Technique: High heat for searing thinly sliced steak or ground beef, then reduce heat to cook down onions and peppers. Combine on the griddle, top with cheese, and melt.
- Tip: A metal dome helps melt the cheese quickly and evenly.
Quesadillas & Grilled Cheese
- Technique: Medium heat. Lightly butter or oil the griddle. Place tortilla/bread, add cheese and fillings, top with another tortilla/bread, and cook until golden brown and cheese is melted.
- Tip: Don’t press too hard, or the cheese will squeeze out.
Seared Chicken and Fish
- Technique: Medium-high to high heat. Ensure chicken/fish is patted dry for a better sear. Oil the griddle, place protein, and cook until a golden crust forms, then flip and finish cooking.
- Tip: Use an instant-read thermometer to ensure proper doneness.
Vegetables and Sides
Don’t forget the veggies! Griddling brings out incredible flavors and textures in vegetables.
Sliced Onions and Peppers
- Technique: Medium heat. Toss with a little oil, salt, and pepper. Cook until tender and slightly caramelized.
- Tip: Great for fajitas, cheesesteaks, or as a side dish.
Asparagus and Broccoli
- Technique: Medium-high heat. Toss with oil, salt, and pepper. Cook until tender-crisp with some char marks.
- Tip: A metal dome can help steam thicker vegetables to ensure they cook through.
Fried Rice or Stir-Fries
- Technique: High heat. Cook proteins and vegetables first, push to a cooler zone. Add rice, scramble eggs, then combine everything and toss vigorously.
- Tip: Use day-old, cold rice for best results; it’s drier and less likely to clump.
Troubleshooting Common Griddling Issues
Even experienced griddlers run into snags. Here’s how to tackle common problems.
Food Sticking to the Griddle
This is probably the most common frustration, but usually easily fixed.
Insufficient Preheating
- Solution: Ensure your griddle is fully preheated. Food releases much more easily from a properly hot surface. Refer to the water test or oil shimmer test.
Not Enough Oil or Wrong Type of Oil
- Solution: Use enough high-smoke-point oil to create a thin, even layer. Re-oil between batches as needed.
Food Isn’t Ready to Flip
- Solution: Many foods, especially proteins, will naturally release from the griddle when they’ve developed a good sear and crust. If it’s sticking, give it another 30 seconds to a minute to form that crust before attempting to flip.
Poorly Seasoned Griddle (Cast Iron/Carbon Steel)
- Solution: If your cast iron or carbon steel griddle is new or hasn’t been used in a while, it might need re-seasoning. Cook with plenty of oil and fat to build up the non-stick layer.
Uneven Cooking
Hot spots are common on gas grills, but you can manage them.
Inadequate Preheating
- Solution: Allow more time for the entire griddle surface to heat evenly, especially for thick cast iron. Start on lower heat and gradually increase.
Grill Burner Issues
- Solution: Check your grill burners. Are they clean and free of blockages? Are they igniting evenly? Clean them if necessary.
Repositioning Food
- Solution: Don’t be afraid to move food around the griddle. Shift items from hotter zones to cooler zones (and vice-versa) as needed to ensure even cooking. Use your heat zones wisely.
Flare-Ups on the Griddle
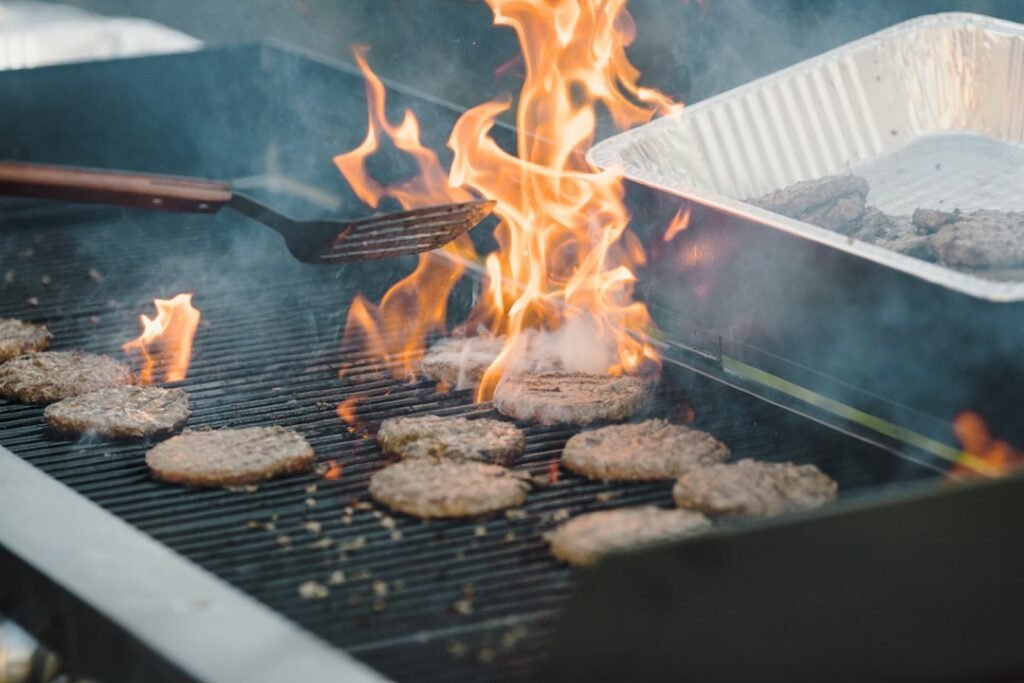
While less common than with direct grilling, flare-ups can still occur, especially with very greasy foods.
Too Much Oil or Fat
- Solution: Use only enough oil to coat the surface. If cooking very fatty items like bacon, scrape away excess rendered fat into a drip tray or discard area as it accumulates.
- Griddle Lip: Ensure your griddle has a slight lip or grease channel to direct rendered fats away from the burner flames.
Grease Accumulation
- Solution: Regularly scrape and clean the griddle surface, especially if you’re cooking multiple fatty batches. Prevent grease from pooling or overflowing onto the burners.
Grill Cleanliness
- Solution: Ensure the underlying grill itself is clean. Old grease and food debris in the drip pan or on flavorizer bars can ignite.
Mastering the art of griddling on your gas grill is all about understanding your equipment, managing your heat, and practicing a few key techniques. It’s an incredibly rewarding way to expand your outdoor cooking and produce restaurant-quality food right in your backyard. Enjoy the journey!