Reverse Sear: Unlock Juicy Steaks With This Easy Technique
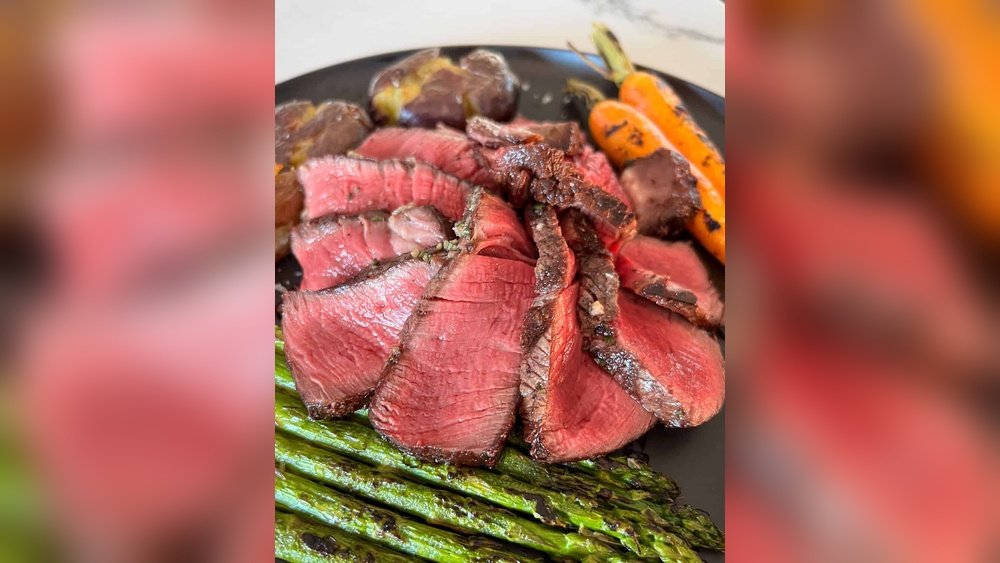
Reverse Sear: The Ultimate Guide For Perfect Steak
If you love steak, you know how hard it is to get that perfect mix of a juicy inside and a crisp, browned crust. Many people try grilling, pan-searing, or broiling, but often, the steak ends up overcooked on the outside and uneven inside. The reverse sear is a method that changes this. It is simple, reliable, and delivers results that impress even professional chefs. In this guide, you’ll learn what reverse sear is, why it works, how to do it step-by-step, and how to make your steak taste as good as the best restaurant. Even if you’re a beginner, you’ll find clear tips, practical advice, and a few expert secrets.
What Is Reverse Sear?
The reverse sear is a way of cooking steak (or other thick cuts of meat) that flips the usual order. Instead of searing the meat first and then finishing in the oven, you cook it gently first, then brown the outside at the end. This method works best for cuts at least 1.5 inches thick, like ribeye, strip steak, or filet mignon.
Here’s how it works:
- Heat the steak slowly in the oven (or grill) at a low temperature.
- When the steak reaches your target internal temperature, sear it quickly in a hot pan or grill to get the crust.
This method gives you:
- Even doneness from edge to edge
- A beautiful, flavorful crust
- More control over the final result
The reverse sear is popular with home cooks and top chefs alike. It’s reliable, forgiving, and produces steaks that rival those from expensive steakhouses.
Why Reverse Sear Works So Well
To understand why reverse sear is effective, you need to know what happens during traditional cooking. When you start with a hot pan or grill, the outside cooks fast, but the inside stays cool. By the time the inside reaches the right temperature, the outside can be dry or burnt.
Reverse sear solves this problem.
Key advantages:
- Gentle cooking: Low heat lets the steak heat evenly, so the color inside is consistent.
- Better Maillard reaction: Searing at the end creates a crisp, flavorful crust without overcooking the interior.
- Juicier meat: Slow heating helps keep moisture inside.
- More forgiving: It’s easier to avoid overcooking with this method.
A non-obvious insight: Reverse sear also dries the surface slightly during the slow cook, which helps the crust develop faster when you sear. This is why the crust is often better than with traditional methods.
Which Steaks Work Best For Reverse Sear?
Not every steak is right for reverse sear. Thickness matters most. Thin cuts (under 1 inch) can cook through too fast and won’t benefit as much.
Best cuts for reverse sear:
- Ribeye: Rich, fatty, and thick—ideal for this method.
- Strip steak (New York Strip): Firm texture, usually thick enough.
- Filet mignon: Lean, tender, and often thick.
- Porterhouse/T-bone: Large, with two textures.
- Tomahawk steak: Extra thick ribeye with a long bone.
Cuts to avoid: Thin flank steak, skirt steak, or flat iron steak. These are better cooked quickly with high heat.
Choosing The Right Steak
When picking your steak, look for these qualities:
- Thickness: At least 1.5 inches. Thicker is better.
- Marbling: White streaks of fat give flavor and keep the meat juicy.
- Freshness: Bright color and firm texture.
- Grade: USDA Prime or Choice are excellent.
For the best results, avoid frozen steaks. Fresh is always better, but if you must use frozen, thaw fully in the fridge before cooking.
Essential Tools For Reverse Sear
You don’t need fancy equipment, but a few tools make the process easier and more reliable.
Must-have tools:
- Meat thermometer: Digital probe is best. It tells you exactly when your steak is ready.
- Oven or grill: For the low-temperature cooking step.
- Heavy pan: Cast iron is ideal for searing. Stainless steel works too.
- Tongs: For flipping without piercing the steak.
- Wire rack: Lets air circulate around the steak for even cooking.
- Baking sheet: Holds the rack and catches drips.
Optional but helpful:
- Chimney starter: If using charcoal for grilling.
- Butter and aromatics: For flavor during the final sear.
The Science Behind Reverse Sear
Reverse sear uses two important cooking principles: gentle heat and the Maillard reaction.
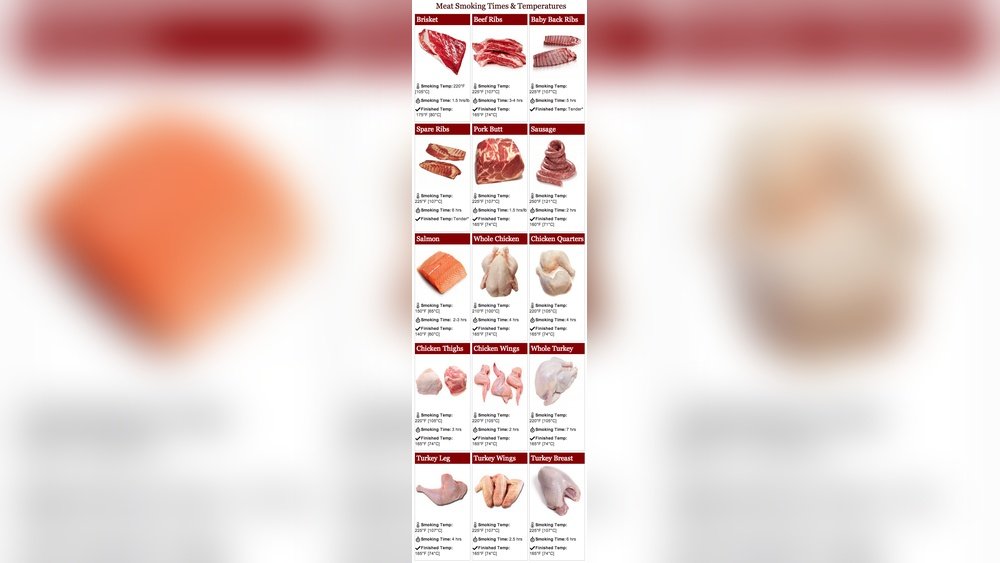
- Gentle heat: When you cook steak slowly at a low temperature (225°F/107°C–275°F/135°C), the heat moves evenly through the meat. This makes the inside tender and keeps the outside from cooking too fast.
- Maillard reaction: When the steak is seared in a hot pan (over 500°F/260°C), sugars and proteins react to form a brown, flavorful crust. This reaction happens best when the surface is dry, which is why slow-cooked steaks sear so well.
A practical tip: If you dry the steak with a paper towel before searing, you’ll get an even better crust.

Credit: www.jessicagavin.com
Step-by-step: How To Reverse Sear A Steak
Here’s the detailed process for the perfect reverse sear steak. Follow each step carefully for the best results.
1. Prepare The Steak
- Take the steak out of the fridge.
- Pat dry with paper towels.
- Season generously with salt and pepper (and other spices if you like).
- Let it rest at room temperature for 30–60 minutes.
2. Slow Cook In The Oven Or Grill
- Preheat your oven to 225°F (107°C). If using a grill, set for indirect heat.
- Place steak on a wire rack over a baking sheet.
- Put in the oven or grill.
- Insert the thermometer into the thickest part.
- Cook until the internal temperature is 10–15°F (5–8°C) below your final target:
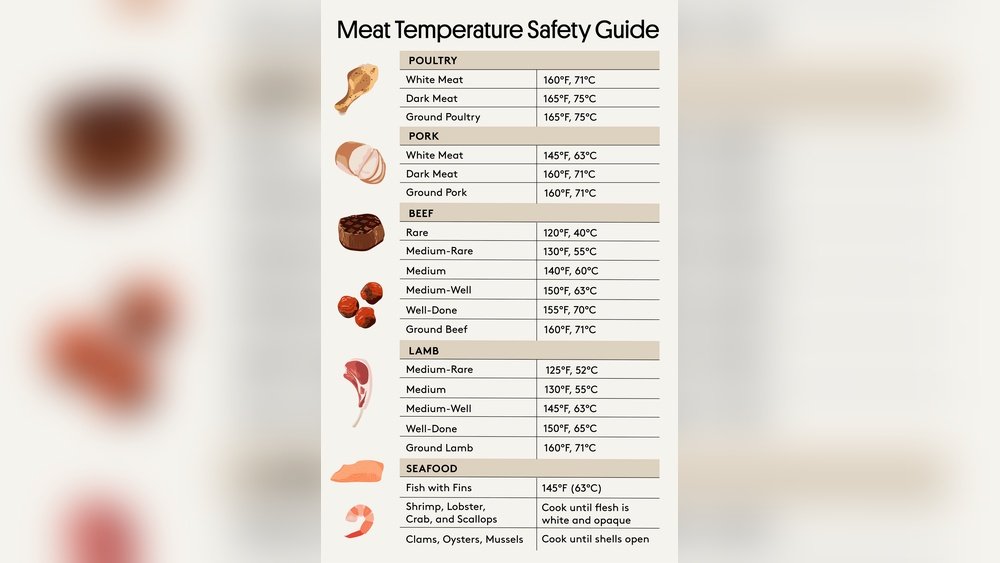
- Rare: 115°F (46°C)
- Medium Rare: 125°F (52°C)
- Medium: 135°F (57°C)
- Medium Well: 145°F (63°C)
Cooking time depends on thickness. A 2-inch steak usually takes 30–45 minutes.
3. Rest The Steak
- Remove the steak from the oven.
- Let it rest for 10–15 minutes. This helps juices settle.
4. Sear The Steak
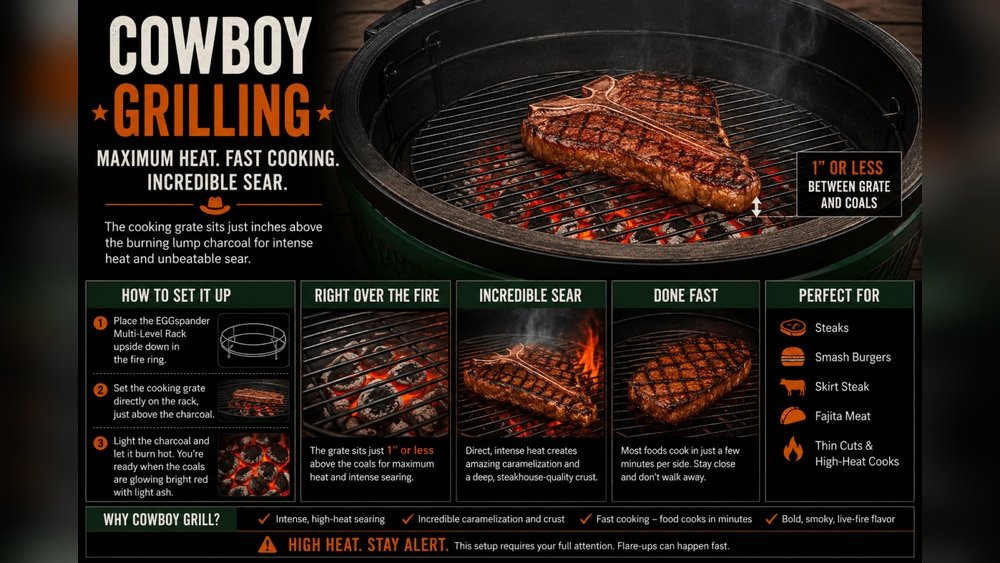
- Heat a cast iron pan or grill to very high heat (over 500°F/260°C).
- Add a small amount of oil (high smoke point like canola or avocado).
- Sear steak for 1–2 minutes per side until a deep brown crust forms.
- Optional: Add butter, garlic, and herbs during the last minute for extra flavor.
5. Serve
- Slice and serve immediately.
- Enjoy the even color and juicy flavor.

Reverse Sear For Other Meats
While steak is the most popular choice, reverse sear works for other meats too.
Good choices:
- Pork chops: Thick-cut, juicy, and flavorful.
- Lamb chops: Tender and rich.
- Roast beef: Large cuts like prime rib.
- Chicken breast: Works for thick cuts, but not as common.
Each meat needs slightly different temperatures and times, but the principle is the same.
Comparing Reverse Sear To Traditional Methods
Many people wonder how reverse sear compares to classic methods. Here’s a look at the differences.
| Method | Cooking Order | Crust Quality | Interior Doneness | Ease |
|---|---|---|---|---|
| Traditional Sear | Sear first, then finish in oven | Good, sometimes uneven | Often uneven, gray bands | Can be tricky |
| Reverse Sear | Cook first, then sear | Excellent, deep brown | Even from edge to edge | More forgiving |
A non-obvious insight: With traditional methods, the outside can overcook while the inside catches up. Reverse sear avoids this, so your steak is tender all the way through.
Common Mistakes With Reverse Sear
Even with a simple method, there are pitfalls you should avoid.
- Searing too long: Over-searing can dry out the crust or burn spices.
- Starting with a cold steak: If the steak is too cold, it won’t cook evenly.
- Skipping the thermometer: Guessing leads to mistakes. Use a probe for accuracy.
- Using too much oil: Excess oil can cause splatter and smoke.
- Not drying the steak: Wet surface prevents proper browning.
A beginner mistake: Rushing the process. Reverse sear takes time. Be patient, and your steak will reward you.
Practical Tips For The Perfect Reverse Sear
- Use coarse salt for better flavor.
- Let the steak rest before and after searing.
- Preheat your pan until it is almost smoking.
- For added flavor, add aromatics (thyme, rosemary, garlic) during the sear.
- Try finishing with a knob of butter for a restaurant touch.
If you want to experiment, try dry-aging your steak in the fridge for a few days. This concentrates flavor and dries the surface for an even better crust.
Reverse Sear On The Grill
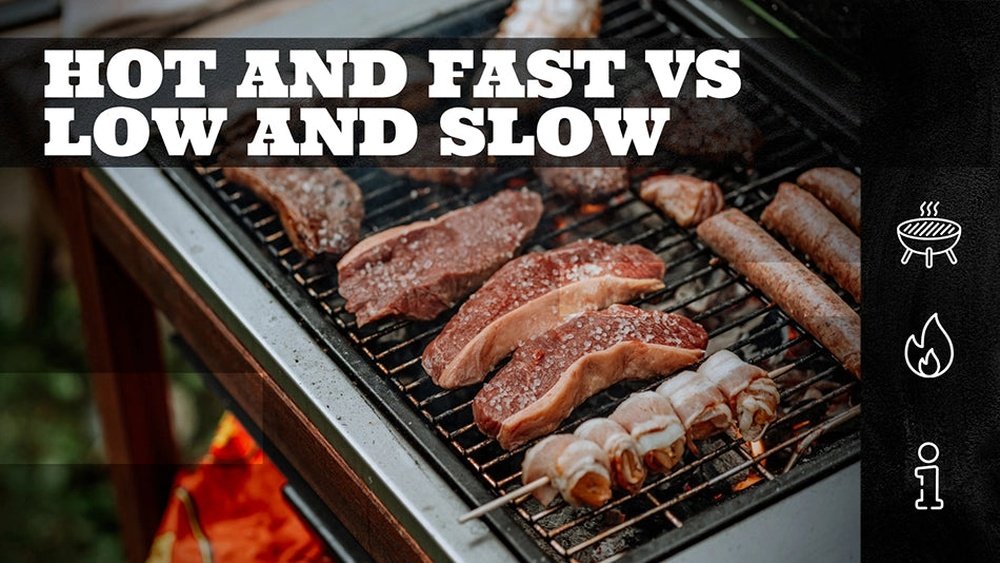
If you prefer grilling, reverse sear can be done outdoors.
How to do it:
- Set up your grill for two zones: One cool, one hot.
- Cook steak on the cool side with the lid closed.
- Move to the hot side for the final sear.
This method adds smoky flavor and is perfect for summer gatherings.

Reverse Sear Vs Sous Vide
Sous vide is another popular method for cooking steak. Both deliver even doneness, but there are differences.
| Method | Temperature Control | Crust Quality | Equipment Needed | Flavor |
|---|---|---|---|---|
| Reverse Sear | Good with oven or grill | Excellent, deep brown | Basic tools | Rich, beefy |
| Sous Vide | Precise, uses water bath | Needs extra sear | Sous vide machine | Clean, mild |
A practical tip: Reverse sear is easier for most home cooks, as it doesn’t require special equipment.
Reverse Sear For Beginners: Example Recipe
If you’re new to reverse sear, start with this easy recipe.
Ingredients:
- 1 thick ribeye steak (about 2 inches)
- 1 tablespoon coarse salt
- 1 teaspoon black pepper
- 1 tablespoon oil (canola or avocado)
- 1 tablespoon butter
- 2 garlic cloves, smashed
- 2 sprigs rosemary
Instructions:
- Pat steak dry and season with salt and pepper.
- Preheat oven to 225°F (107°C).
- Place steak on wire rack over baking sheet.
- Cook until internal temperature is 125°F (52°C) for medium rare (about 40 minutes).
- Let rest 10 minutes.
- Heat pan until very hot. Add oil.
- Sear steak 1–2 minutes per side.
- Add butter, garlic, and rosemary. Spoon over steak for flavor.
- Remove from pan and slice.
Cooking time: 40–50 minutes
Serving size: 1–2 people
Reverse Sear For Large Cuts
You can use reverse sear for big pieces like prime rib or pork loin.
How to do it:
- Cook slowly at low heat until almost done.
- Let rest.
- Sear in hot oven or grill for a crust.
This method gives you a juicy roast with a crisp exterior.
Reverse Sear For Different Levels Of Doneness
Everyone has their own taste for steak doneness. Reverse sear makes it easy to hit your target.
Target temperatures:
- Rare: 125°F (52°C)
- Medium Rare: 135°F (57°C)
- Medium: 145°F (63°C)
- Medium Well: 155°F (68°C)
- Well Done: 160°F (71°C)
For best results, stop cooking 10–15°F below your target, then finish with the sear.
Reverse Sear For Special Diets
Reverse sear can fit many diets:
- Low-carb/Keto: Steak is naturally low in carbs.
- Paleo: Works well with natural seasonings.
- Gluten-free: No flour needed.
- Dairy-free: Just skip butter or use oil.
If you want to add more flavor, use spice blends or marinades that fit your diet.
Reverse Sear Myths And Facts
Some myths about reverse sear persist. Let’s clear them up.
Myth: Reverse sear is complicated.
Fact: It is simple once you know the steps.
Myth: Only works for steak.
Fact: Works for any thick cut of meat.
Myth: Needs special tools.
Fact: Any oven and pan will do.
A common misconception: Reverse sear takes too long. In reality, it’s only slightly longer than traditional methods and gives much better results.
Reverse Sear For Restaurants Vs Home Cooks
Many restaurants use reverse sear for big steaks and roasts. Home cooks can do the same with basic tools.
Restaurant advantages:
- Precise ovens and pans
- Dry-aged beef
Home advantages:
- Custom seasoning
- Flexible timing
A practical tip: At home, you can experiment with flavors and doneness. Restaurants stick to classic recipes.
Reverse Sear And Food Safety
Cooking steak at low temperature can worry some people. Is it safe? Yes, as long as you follow basic rules.
- Always cook steak to at least 125°F (52°C) for rare.
- Use a clean thermometer.
- Let steak rest to finish cooking.
- Sear at high heat to kill surface bacteria.
For more details, see the Maillard reaction.
Reverse Sear For Different Types Of Ovens
You can use reverse sear with many ovens:
- Gas oven: Easy to control temperature.
- Electric oven: Reliable heat.
- Convection oven: Faster, more even cooking.
A practical tip: Use the convection setting if you have it. Air movement dries the surface for a better crust.
Reverse Sear And Seasoning
Seasoning is key. Salt and pepper are classic, but you can try:
- Garlic powder
- Smoked paprika
- Cumin
- Chili flakes
Season before the slow cook. For extra flavor, add fresh herbs and butter during the final sear.
:max_bytes(150000):strip_icc()/__opt__aboutcom__coeus__resources__content_migration__serious_eats__seriouseats.com__images__2017__02__20170217-reverse-sear-steak-02-d86b7f4676d240c196acf6903523c99f.jpg)
Credit: www.seriouseats.com
Reverse Sear For Meal Prep
Reverse sear works for meal prep. Cook steak in advance, then sear right before serving.
How to do it:
- Cook steaks to just below target temp.
- Store in fridge up to 2 days.
- Sear when ready to eat.
This is useful for entertaining or busy schedules.
Reverse Sear For Outdoor Cooking
If you like camping or grilling, reverse sear is possible outdoors.
How to do it:
- Use a grill with two zones.
- Slow cook on cool side.
- Sear over hot coals.
A practical tip: Use wood chips for extra smoky flavor.
Reverse Sear For Parties
For parties, reverse sear helps you serve perfect steak to many guests.
How to do it:
- Cook several steaks at once in oven.
- Sear quickly in batches.
- Serve hot and fresh.
A common mistake: Letting steaks sit too long after searing. Serve right away for best flavor.
Reverse Sear For Vegetarians
You can use the reverse sear method for vegetables, too.
Good choices:
- Thick portobello mushrooms
- Cauliflower steaks
- Eggplant slices
Slow cook to soften, then finish with a hot sear for flavor.
Reverse Sear And Steakhouse Quality
Many people wonder why restaurant steaks taste better. Reverse sear is one reason. Steakhouses use high-quality beef, dry-aged, and finish with a hot sear.
A practical tip: Buy the best steak you can afford. Quality meat makes the biggest difference.
Reverse Sear And Dry Aging
Dry aging is a process that concentrates flavor and tenderizes meat. If you have access to dry-aged beef, it works beautifully with reverse sear.
How to dry age at home:
- Place steak on a rack in fridge for 3–5 days.
- Pat dry before cooking.
- Follow reverse sear steps.
Dry-aged beef has a richer, nuttier flavor.
Reverse Sear For Busy Cooks
If you’re short on time, reverse sear can still work.
Tips:
- Prep steak ahead of time.
- Use oven for slow cook while you do other tasks.
- Sear quickly before serving.
Reverse sear is flexible and lets you plan ahead.
Reverse Sear For Different Cuisines
Reverse sear isn’t just for American steaks. Try it with seasonings from other cuisines:
- French: Herbs de Provence, garlic, butter
- Italian: Rosemary, olive oil, pepper
- Asian: Soy sauce, ginger, sesame oil
A practical tip: Experiment with global flavors for unique results.
Reverse Sear For Steak Toppings
Finish your steak with toppings for extra flavor:
- Compound butter (herbs, garlic)
- Blue cheese
- Crispy onions
- Peppercorn sauce
Add toppings after the final sear for best results.
Reverse Sear For Health-conscious Cooks
Reverse sear uses less oil than deep frying. For healthier results:
- Trim excess fat from steak.
- Use healthy oils (avocado, olive).
- Add vegetables as sides.
A practical tip: Pair steak with a fresh salad for balance.

Credit: www.omahasteaks.com
Reverse Sear And Food Waste
Reverse sear helps reduce waste. Even tough cuts can be juicy and tender with this method.
How to use leftovers:
- Slice for steak salads.
- Add to sandwiches.
- Use in stir fry.
A practical tip: Save bones and trimmings for broth.
Reverse Sear For Beginners: Key Takeaways
If you’re new, remember:
- Start with a thick steak.
- Use a thermometer.
- Cook slow, then sear hot.
- Let rest before and after searing.
- Experiment with flavors and sides.
Reverse sear is forgiving, so don’t stress. Practice makes perfect.
Reverse Sear And Steak Economics
Steak can be expensive, but reverse sear lets you get steakhouse quality at home.
Cost comparison:
- Restaurant steak: $25–$50
- Home-cooked steak: $10–$20
A practical tip: Buy in bulk and freeze for savings.
Reverse Sear For The Perfect Meal
Reverse sear is more than a technique—it’s a way to enjoy steak at its best. Whether you’re cooking for family, friends, or just yourself, you’ll get results that make every meal special.
Remember, practice and patience are key. With this guide, you have everything you need to master reverse sear and impress anyone who loves steak.
Frequently Asked Questions
What Is The Best Steak Thickness For Reverse Sear?
The best thickness is 1.5–2 inches. Thicker steaks benefit most from reverse sear because the slow cook helps heat the inside evenly and the final sear gives a great crust.
Can I Reverse Sear A Frozen Steak?
You should thaw the steak fully before reverse searing. Frozen steaks cook unevenly and may not develop a proper crust. Thaw in the fridge for best results.
Do I Need A Meat Thermometer?
Yes, a meat thermometer is essential for accuracy. It helps you avoid overcooking and ensures the steak is cooked just right.
How Long Does Reverse Sear Take?
A typical 2-inch steak takes 30–45 minutes for the slow cook and 2–4 minutes for the sear. Total time is about 50 minutes. Thicker cuts may take longer.
Is Reverse Sear Safe For All Meats?
Reverse sear is safe for thick cuts of beef, pork, lamb, and some poultry. Always cook to the recommended internal temperature and use proper hygiene.
Reverse sear is a game-changer for anyone who loves steak. With simple steps and a little patience, you can turn any thick cut into a restaurant-quality meal. Give it a try, and you’ll see why so many cooks and chefs recommend it.