Cleaning a Smoker (How To): Easy Steps for a Spotless Grill

Keeping your smoker clean is more than just a chore—it’s an essential step for great barbecue and healthy cooking. Many people think smokers only need cleaning when they look dirty, but even small buildups can affect food flavor and safety. If you love smoked meats, cheese, or vegetables, learning to clean your smoker properly will help you get consistent results every time. This guide covers everything you need to know: from why cleaning matters, what tools to use, step-by-step instructions, and some pro tips that many beginners miss.
Why Cleaning A Smoker Matters
A smoker’s main job is to cook food with smoke and heat. Over time, grease, ash, and food particles collect inside. If these aren’t removed, they can:
- Make your food taste bitter or strange
- Cause smoke to flow unevenly
- Attract mold and bacteria
- Increase fire risks
For example, a study by the USDA found that dirty cooking surfaces can double the risk of bacterial contamination. Even if you only use your smoker occasionally, regular cleaning keeps it safe and working smoothly.
Types Of Smokers And Cleaning Differences
Not all smokers are the same. There are several main types, and each has unique cleaning needs. Understanding these differences helps you choose the right cleaning approach.
| Type of Smoker | Main Material | Cleaning Frequency | Key Areas to Clean |
|---|---|---|---|
| Electric | Steel/Aluminum | Every 3-5 uses | Heating element, racks, drip pan |
| Charcoal | Steel/Cast iron | After each use | Grates, firebox, ash pan |
| Pellet | Steel | Every 2-3 uses | Burn pot, grates, hopper |
| Gas | Steel | Every 3-5 uses | Burner, grates, drip tray |
For example, charcoal smokers produce more ash, so you need to clean them more often. Pellet smokers have a burn pot that can clog if not cleaned. Knowing your smoker’s design makes cleaning easier and faster.
Essential Tools And Supplies
Having the right tools makes smoker cleaning safer and more effective. You don’t need fancy equipment—just a few basics:
- Wire brush: Removes tough debris from grates.
- Plastic scraper: For cleaning drip pans and walls.
- Shop vacuum: Handles ash and loose particles.
- Non-abrasive sponge: For gentle scrubbing.
- Mild dish soap: Cuts grease without harming surfaces.
- Bucket of warm water: For rinsing.
- Disposable gloves: Protects your hands.
- Paper towels or clean rags: For drying.
- Spray bottle: Mix water and soap for easy application.
Some advanced smokers need special cleaning solutions. Always check your owner’s manual before using harsh chemicals. Stainless steel cleaners can help with exterior surfaces, but avoid them inside the smoker.
Step-by-step Guide: Cleaning Your Smoker
Let’s break down the process so you can clean any smoker thoroughly. These steps apply to most models, but you can adjust them for your specific type.
Step 1: Cool Down And Unplug
Never clean a hot smoker. Wait until it’s fully cooled. For electric and gas smokers, unplug or turn off the fuel source.
Tip: Cleaning while slightly warm (not hot) makes grease easier to remove.
Step 2: Remove Grates And Internal Parts
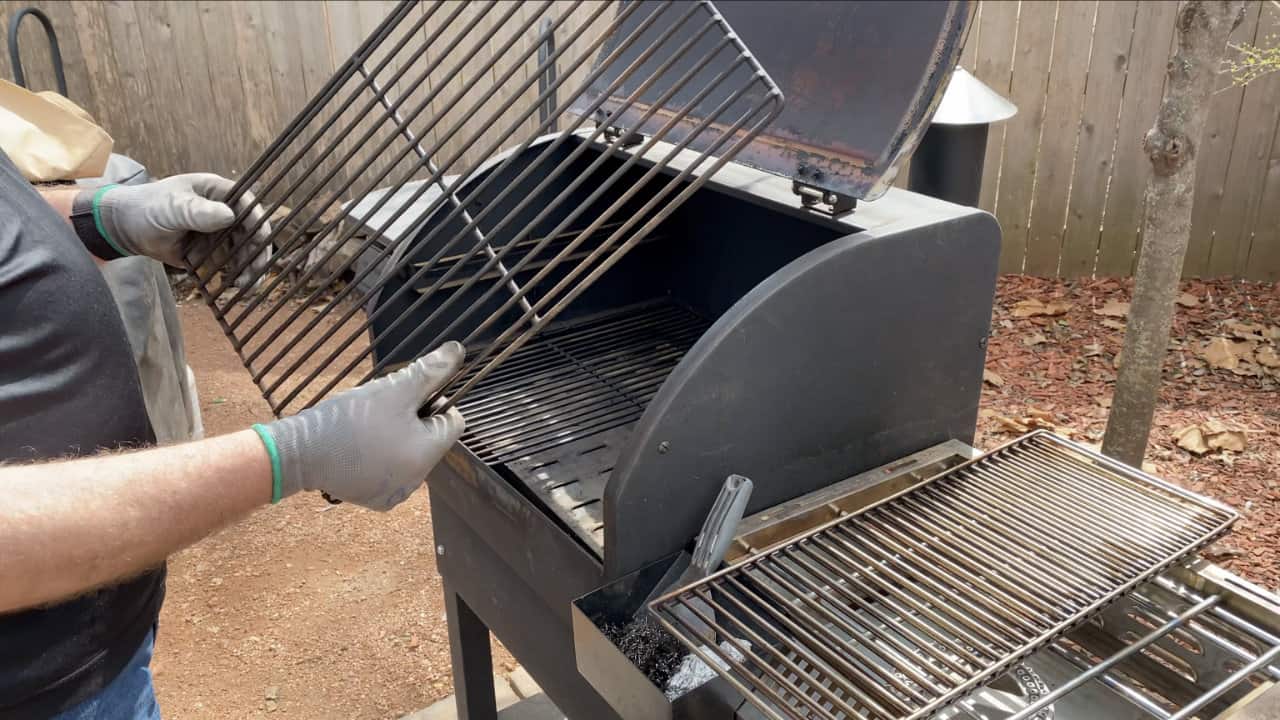
Take out cooking grates, drip pans, water pans, and any removable racks. If parts are dishwasher-safe, you can clean them separately.
Step 3: Brush Off Loose Debris
Use a wire brush or scraper to loosen ash, burnt food, and grease. Sweep the inside walls, firebox, and grates.
Beginner insight: Many people skip brushing the ceiling of the smoker. This area collects grease and soot, affecting flavor and airflow.
Step 4: Vacuum Ash And Particles
A shop vacuum is ideal for removing ash from charcoal or pellet smokers. Make sure the ash is completely cool to avoid fire risk.
Step 5: Clean Grates And Pans
Soak grates and pans in warm soapy water. Scrub with a sponge or brush. Rinse and let them dry completely.
Pro tip: If grease is stubborn, sprinkle baking soda before scrubbing. This helps break down oily buildup.
Step 6: Wipe Down Interior
Spray a mild soap solution inside the smoker. Use a sponge to wipe down walls, doors, and corners. Avoid using too much water—damp, not soaked.
Mistake to avoid: Never use harsh chemicals inside the smoker. They can leave residues and affect your food.
Step 7: Clean The Exterior
Wipe the outside with a soft cloth and stainless steel cleaner (if needed). This prevents rust and keeps your smoker looking new.
Step 8: Inspect And Maintain
Check for rust, loose screws, or damaged seals. Replace any worn parts. Make sure vents and doors work smoothly.
Step 9: Reassemble And Dry
Put all parts back once they are dry. Leave the smoker open for a few hours to ensure moisture evaporates.
Step 10: Season (optional)
If you removed a lot of buildup, consider “seasoning” your smoker. Run it empty at high heat for 30–60 minutes. This helps burn off residues and adds a protective layer.
Cleaning Frequency And Schedules
How often should you clean your smoker? The answer depends on how much you use it and what you cook.
| Usage Frequency | Recommended Cleaning | Notes |
|---|---|---|
| Weekly use | After every use | Deep clean monthly |
| Occasional use | Every 2–3 uses | Deep clean every 2–3 months |
| Heavy use (restaurants) | Daily | Deep clean weekly |
Deep cleaning means removing all parts and cleaning every surface. Light cleaning is just brushing and wiping grates.
If you smoke fatty meats, clean more often. Fish and cheese leave sticky residues that need extra attention.
Troubleshooting Common Cleaning Problems
Even with careful cleaning, you may face some challenges. Here’s how to solve them:
Stubborn Grease
If grease won’t come off, use a mix of vinegar and baking soda. Apply, let it sit for 10 minutes, then scrub.
Mold Or Mildew
If you find mold, remove all parts and clean with hot soapy water. Run the smoker empty at high heat to kill spores.
Beginner insight: Mold often grows in unused smokers. Store your smoker with the lid open when not in use to prevent this.
Rust
Use a steel wool pad to remove surface rust. For deep rust, sand the area and repaint with high-temperature paint.
Ash Clogs
Pellet smokers sometimes clog in the burn pot. Clean this area every few uses with a vacuum.
Bad Smell
After cleaning, run the smoker empty for 30–60 minutes. This burns off odors and leaves a clean scent.
Credit: www.smoking-meat.com
Tips For Keeping Your Smoker Clean Longer
There are ways to reduce cleaning time and keep your smoker in better shape:
- Use foil liners: Put aluminum foil in the drip pan or on grates. This catches grease and makes cleanup easier.
- Empty ash regularly: Don’t wait for ash to pile up. Remove after each use.
- Cover your smoker: Keep it dry and protected from weather.
- Avoid sugary sauces: These create sticky buildup.
- Clean after each cook: It’s easier to remove fresh residue than old, hardened debris.
Pro tip: Oil the grates before cooking. This prevents food from sticking and makes cleaning easier.
Cleaning Different Smoker Parts
Some parts need special care. Let’s look at a few:
Grates
Made of steel, cast iron, or porcelain. Clean with a wire brush after each use. For tough buildup, soak in hot water.
Firebox
The firebox collects ash and burned wood. Remove ash after every cook. If your smoker has a removable ash pan, clean it often.
Water Pan
Water pans collect drippings. Wash with soap and water. Check for rust and replace if needed.
Burn Pot (pellet Smokers)
Vacuum the burn pot every 2–3 uses. If pellets get wet, empty and dry before using.
Hopper
Pellet hoppers can attract mold if left full. Empty and wipe down occasionally.
Heating Element (electric Smokers)
Unplug and gently wipe with a dry cloth. Never use water.
Cleaning Smokers After Cooking Different Foods
Some foods leave unique residues. Here’s how to handle them:
After Cooking Fish
Fish oils stick to surfaces. Clean grates and pans with hot soapy water. Run the smoker empty to burn off odors.
After Cooking Cheese
Cheese melts and leaves sticky residue. Scrape, wipe, and wash grates thoroughly.
After Cooking Ribs And Pork
Fatty meats leave lots of grease. Use baking soda and soap to clean grates and drip pans.
Mistake to avoid: Waiting days before cleaning. Residue hardens and becomes more difficult to remove.
Safety Precautions When Cleaning Smokers
Cleaning smokers can be messy, but safety matters. Here are important points:
- Always let the smoker cool before cleaning
- Wear gloves to protect from sharp edges and chemicals
- Avoid using flammable cleaners
- Dispose of ash safely—never in plastic bags
- Keep children and pets away from the cleaning area
If you use chemicals, rinse thoroughly and air out the smoker before cooking again.
How To Season Your Smoker After Cleaning
Seasoning is a step many beginners skip. It helps maintain the smoker and improves flavor. Here’s how:
- After cleaning, reassemble all parts.
- Coat grates and interior surfaces lightly with cooking oil.
- Run the smoker empty at high heat (250–300°F) for 1 hour.
- Let it cool and wipe any excess oil.
Seasoning forms a protective layer, prevents rust, and gives better smoke flavor. You only need to season after deep cleaning or if you scrub off lots of residue.
Professional Cleaning Vs Diy
Some people hire professionals to clean their smokers, especially in restaurants. Is it worth it for home users?
| Method | Cost | Time Needed | Effectiveness |
|---|---|---|---|
| DIY | Low ($10–$30) | 1–2 hours | Good |
| Professional | High ($100–$200) | 30–60 minutes | Excellent |
Professional cleaning is faster and more thorough, but costly. For most home smokers, DIY is enough if you follow the steps carefully.
Non-obvious insight: Some pro cleaners use steam and special tools. If you have a large smoker or stubborn buildup, consider professional help once a year.
Environmental Considerations
Cleaning smokers produces waste—ash, grease, dirty water. Here’s how to handle it responsibly:
- Dispose of ash in a metal container, not plastic bags
- Pour greasy water in a sealed bag; never down the drain
- Recycle or reuse aluminum foil liners
- Use eco-friendly soaps where possible
Pro tip: Ash from untreated wood can be used in gardens as fertilizer. But avoid ash from treated or painted wood.
How Cleaning Impacts Flavor And Performance
Many people don’t realize that a dirty smoker changes the taste of food. Old grease and burnt residue produce bitter or sour smoke. Clean smokers give pure, smoky flavor.
A clean smoker also:
- Cooks food more evenly
- Uses less fuel
- Lasts longer
If your smoker smells strange or food tastes off, cleaning is often the solution.
Cleaning A Smoker For The First Time
If you’re new to smokers, the first cleaning can feel overwhelming. Here’s a simple checklist:
- Read the manual for your smoker model
- Gather tools and supplies
- Follow the step-by-step cleaning process above
- Take photos before and after, so you remember how parts fit
- Season the smoker before your first cook
Beginner mistake: Forgetting to rinse after using soap. Soap residue can ruin food flavor.
Troubleshooting: When To Replace Parts
Sometimes cleaning isn’t enough. If you notice:
- Grates with deep rust or cracks
- Burners that don’t light
- Seals that leak smoke
- Firebox with holes
It’s time to replace these parts. Using damaged parts is unsafe and affects performance.
Storing Your Smoker After Cleaning
Proper storage keeps your smoker clean and ready for use. Here’s how:
- Store with lid open for a few hours to dry
- Cover with a waterproof cover
- Keep in a dry, sheltered area
- Remove pellets or charcoal before storing
Pro tip: Lubricate hinges and moving parts to prevent rust.
Cleaning Smokers In Winter
Cold weather makes cleaning harder. Here are tips for winter:
- Clean indoors if possible, using garage or covered area
- Use warm water to loosen grease
- Dry all parts completely to prevent freezing
If you store your smoker outside, check for ice and moisture before cooking.

Credit: www.youtube.com
Cleaning Smokers For Health And Safety
Food safety is a top concern. Dirty smokers can harbor bacteria and mold. The CDC reports that unclean cooking equipment causes thousands of foodborne illnesses each year.
To keep your smoker safe:
- Clean after each cook
- Remove all ash and grease
- Dry all parts before reassembling
- Check for mold before every use
Non-obvious insight: Even small bits of old food can cause illness, especially for kids and seniors.
Advanced Cleaning Methods
If you want extra-deep cleaning, try these advanced methods:
Steam Cleaning
Use a handheld steamer to loosen tough grease. Steam is safe and chemical-free.
Vinegar Solution
Mix equal parts vinegar and water. Spray and wipe for natural cleaning.
Power Washing
Some large smokers can be power washed. Check your manual first. Never use high pressure on electrical parts.
Common Myths About Cleaning Smokers
Many people believe myths that can harm their smoker:
- Myth: You don’t need to clean smokers because smoke kills germs.
- Fact: Smoke doesn’t remove grease or food particles.
- Myth: Soap ruins smoker flavor.
- Fact: Soap is safe if rinsed well.
- Myth: Only professional cleaning works.
- Fact: DIY cleaning is effective with the right steps.
Examples: Real-life Cleaning Stories
Case 1: John, a backyard BBQ fan, noticed his ribs tasted bitter. Cleaning his smoker grates and firebox fixed the problem.
Case 2: Maria left her pellet smoker unused for months. When she returned, mold had grown inside. She cleaned with soap and ran the smoker hot. The mold disappeared and flavor improved.
Case 3: Restaurant owner David cleans his smoker daily. His customers praise the clean, smoky taste of his brisket.
Credit: www.reddit.com
The Cost Of Not Cleaning
Ignoring smoker cleaning leads to:
- Bad-tasting food
- Higher fuel costs
- Shorter smoker lifespan
- Health risks
A survey by the National Barbecue Association found that regular cleaning increases smoker life by 40%. It also reduces fire risk.
Cleaning Tips For Busy People
Don’t have much time? Try these shortcuts:
- Brush grates while they’re still warm (but not hot)
- Use disposable liners
- Wipe down surfaces after each cook
- Schedule monthly deep cleaning
Even small steps make a big difference.

How To Clean Smokers For Large Events
If you host big cookouts, cleaning is even more important. Here’s a plan:
- Clean before and after the event
- Use foil liners for easy cleanup
- Keep extra brushes and rags handy
- Assign someone to check and clean during the event
Large groups mean more food and more mess. Plan ahead so you don’t get overwhelmed.
Cleaning Smokers With Natural Products
If you prefer eco-friendly cleaning, try:
- Baking soda for scrubbing
- Vinegar for dissolving grease
- Lemon juice for fresh scent
Avoid bleach and strong chemicals. They can damage smoker surfaces and linger in food.
Cleaning Smoker Accessories
Don’t forget accessories:
- Thermometers: Wipe with damp cloth
- Wood chip trays: Wash with soap and water
- Racks and baskets: Soak and scrub
Clean accessories last longer and perform better.
Cleaning New Smokers
If you buy a new smoker, clean it before first use. Manufacturing oils and residues can affect taste and safety.
Steps:
- Wash grates and pans with soap and water
- Wipe interior surfaces
- Season at high heat for 1 hour
This prepares your smoker for safe, tasty cooking.
Cleaning Smokers After Long Storage
If your smoker hasn’t been used for months:
- Inspect for mold and rust
- Clean all surfaces with soap
- Run empty at high heat to burn off odors
- Oil grates before cooking
Long storage increases the risk of buildup. Always check and clean before cooking.
Comparing Cleaning Methods
Here’s a quick comparison of popular cleaning methods:
| Method | Effectiveness | Cost | Time |
|---|---|---|---|
| Soap and Water | High | Low | 30–60 min |
| Vinegar Solution | Medium | Low | 20–40 min |
| Steam Cleaning | High | Medium | 30–60 min |
| Power Washing | Very High | High | 10–20 min |
Choose the method that fits your smoker and your cleaning needs.
Cleaning Smokers For Better Barbecue
Clean smokers produce the best barbecue. If you want award-winning flavor and safe cooking, make cleaning a habit. Even top pitmasters agree: “A clean smoker is a happy smoker.”
Non-obvious insight: Cleaning not only removes dirt, but also improves heat flow. This gives more even cooking and juicier meat.
Where To Find More Information
If you want to learn more about smoker cleaning, visit Serious Eats. They offer expert tips and advanced techniques.

Frequently Asked Questions
How Often Should I Clean My Smoker?
For best results, clean your smoker after every use. Deep cleaning is needed monthly if you cook often, or every 2–3 months if you use it occasionally.
Can I Use Bleach To Clean My Smoker?
No. Bleach is too strong and can leave harmful residues. Use mild soap, vinegar, or baking soda instead.
Is It Safe To Clean Smokers With Water?
Yes, but use water carefully. Don’t soak electrical parts. Wipe and dry all surfaces before reassembling.
How Do I Prevent Rust In My Smoker?
Dry all parts fully after cleaning. Oil grates lightly and store your smoker with a cover in a dry place.
What Should I Do If My Smoker Smells Bad After Cleaning?
Run the smoker empty at high heat for 30–60 minutes. This burns off odors and leaves a fresh scent.
Cleaning your smoker is a simple habit that makes every barbecue better. With the right tools and steps, your smoker will stay safe, efficient, and ready for delicious meals. Whether you’re a weekend griller or a BBQ pro, clean equipment is the key to great food and happy guests.