Grill Temperature Control: Master Perfect BBQ Every Time
Grill Temperature Control: Mastering Heat For Perfect Bbq Results
Grilling is more than just cooking food over fire—it’s an art where temperature control separates good from great. Whether you’re a weekend BBQ fan or aiming for professional results, understanding how to manage heat is crucial. Many cooks focus on recipes or marinades but overlook the science of grill temperature. This often leads to uneven cooking, burnt outsides, or raw centers. Mastering grill temperature control gives you the power to create tender brisket, juicy chicken, and crisp vegetables every time.
In this guide, you’ll discover how different grills handle heat, the best methods to measure and adjust temperature, and tips that even experienced grillers sometimes miss. You’ll also see real-life examples, practical comparisons, and answers to common questions. By the end, you’ll feel confident managing any grill and ready to impress your guests.
Why Grill Temperature Control Matters
Grill temperature isn’t just a number—it’s the foundation for flavor, safety, and consistency. Cooking at the wrong temperature can ruin a perfect steak or make chicken unsafe to eat. But when you control the heat, you:
- Avoid undercooked or burnt food by keeping temperatures in the right range.
- Unlock different flavors—low and slow for smoky brisket, high and fast for seared steak.
- Cook safely by reaching the recommended internal temperatures.
- Save money by using fuel efficiently and avoiding wasted food.
Studies show that most grilling mistakes come from poor heat management, not bad recipes. For example, the USDA reports that cooking chicken below 165°F increases the risk of foodborne illness. This makes temperature control a safety issue, not just a quality one.
Let’s look at a common scenario: You place a thick steak over high heat and leave it. The outside burns before the inside cooks. If you had used a two-zone setup, you could sear first, then finish over lower heat for a perfect result. Temperature control is the difference between a dry, tough steak and a juicy, tender one.
Another point people miss is repeatability. If you cook at random temperatures, every meal turns out different. With proper temperature control, you can recreate your best BBQ anytime, giving you confidence and consistency.
Understanding Grill Types And Their Temperature Control
Every grill has its own way of controlling heat. Knowing how your grill works is the first step to mastering temperature.
Gas Grills
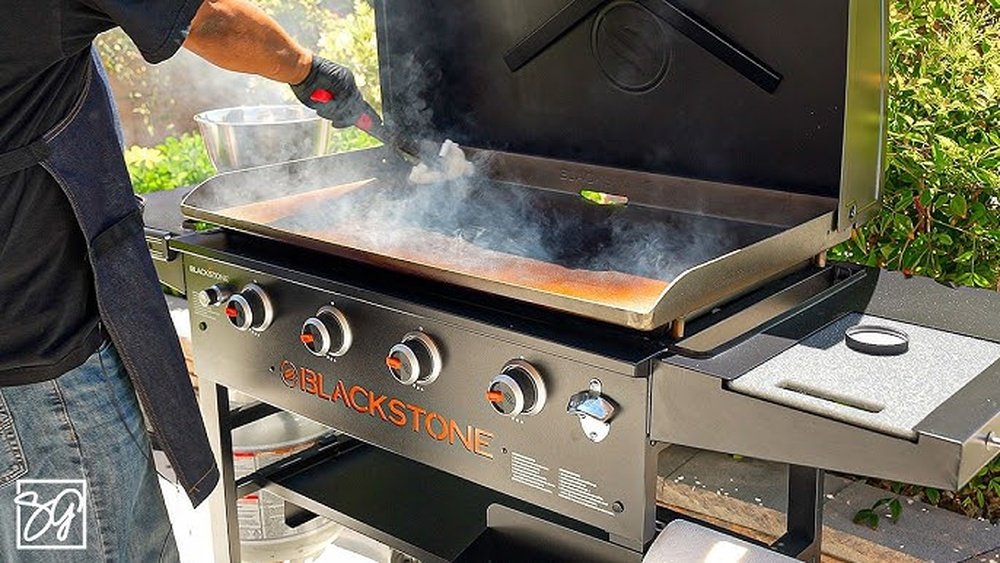
Gas grills are popular for their convenience. They use propane or natural gas and heat up quickly. Most have built-in knobs to adjust the flame, making it easy to change temperature.
- Strengths: Fast heating, precise control, easy to clean.
- Weaknesses: Can have hot and cold spots, less smoky flavor.
Non-obvious insight: The position of burners affects temperature zones. Using only one side creates indirect heat, perfect for slow-cooking or roasting.
To improve control, some gas grill owners place a foil pan of water on the cooler side, helping stabilize temperatures and add moisture. Also, cleaning burner tubes regularly prevents uneven heating, which many overlook.
Charcoal Grills
Charcoal grills deliver classic BBQ flavor. You control temperature by adjusting the amount of charcoal, the airflow (using vents), and the distance between food and coals.
- Strengths: Rich smoke flavor, high heat possible, flexible setup.
- Weaknesses: Slower to adjust, learning curve for beginners.
Non-obvious insight: The type of charcoal matters. Lump charcoal burns hotter but faster; briquettes give steady heat longer.
Many beginners don’t realize that stacking charcoal differently changes the heat. For example, a pyramid pile gives intense heat for searing, while spreading coals in a single layer lowers the temperature for gentle cooking. Also, using a chimney starter helps light coals evenly, reducing temperature swings at the start.
Pellet Grills
Pellet grills use wood pellets and an electric control system. They set temperature automatically, feeding pellets as needed.
- Strengths: Set-and-forget, consistent temperature, smoky flavor.
- Weaknesses: Need electricity, more expensive, pellets can jam.
Pro tip: Clean the pellet hopper and auger regularly to avoid feed problems that cause temperature swings.
Pellet grills often include advanced features like WiFi control or meat probes. These help you monitor and adjust temperature remotely, making long cooks easier. However, don’t rely only on digital readings—verify with a separate thermometer, as electronics can fail.
Electric Grills
Electric grills are easy for indoor or apartment use. They heat with electric coils, usually with a dial or button to set temperature.
- Strengths: Simple, safe indoors, no open flame.
- Weaknesses: Limited high heat, less authentic grill flavor.
For better results, let the electric grill preheat fully before adding food. Many people skip this step, causing uneven cooking. Also, remember that electric grills lose heat quickly if the lid is opened often.
Comparing Grill Temperature Range And Control
Here’s a quick look at how different grills handle temperature:
| Grill Type | Temperature Range (°F) | Control Method | Heat Up Time (min) |
|---|---|---|---|
| Gas | 200–700 | Knobs | 5–10 |
| Charcoal | 225–700+ | Vents/Charcoal Amount | 15–30 |
| Pellet | 180–500 | Digital Controller | 10–20 |
| Electric | 200–450 | Dial/Button | 10–15 |
Notice that charcoal and gas grills can reach the highest temperatures, which is important for searing. Pellet and electric grills excel at steady, moderate heat, ideal for slow cooking or delicate foods.

Credit: www.smokedbbqsource.com
How To Measure Grill Temperature Accurately
Controlling heat starts with knowing your grill’s actual temperature—not just guessing. Built-in thermometers can be off by 50°F or more, especially in the lid.
Tools For Measuring Temperature
- Grill surface thermometers: Place on the grate for true cooking surface readings.
- Infrared thermometers: Aim at the grate for instant results.
- Probe thermometers: Insert into thick food for internal temperature.
Tip: Always measure at the grill grate level, not just the lid, for real accuracy.
Many grillers forget to check temperatures in multiple spots. If your grill has hot and cold areas, use an infrared thermometer to scan across the grate before placing food. This avoids surprises like one steak being cooked while another is still raw.
Calibrating Built-in Thermometers
If your grill’s thermometer seems off, test it in boiling water (should read 212°F at sea level). If not, adjust your expectations or get a better thermometer.
Another practical tip: Place two grill surface thermometers on different sides of the grate. This helps you spot uneven heating, which is common in larger grills or windy conditions.
The Science Of Heat Zones
Grills don’t heat evenly. Learning about direct and indirect heat zones helps you cook different foods at once and control doneness.
Direct Heat
Food sits right above the flame or coals. Best for searing steaks, burgers, or thin cuts that cook quickly.
Direct heat is ideal for creating a crust or caramelizing the outside of meat. Quick-cooking vegetables like asparagus or sliced zucchini also benefit from direct heat.
Indirect Heat
Food cooks away from the flame, using hot air to roast or bake. Ideal for thick meats, whole chickens, or anything needing gentle heat.
Indirect heat is perfect for ribs, brisket, or delicate fish. It prevents burning and allows heat to penetrate slowly, making food tender.
Multi-zone Cooking
Set up your grill with both hot and cooler areas. For example, pile coals on one side, or light only half your gas burners. This lets you move food as needed—sear first, then finish gently.
Beginner mistake: Cooking everything over direct heat leads to burnt outsides and raw insides. Use indirect zones for better results.
Some grillers add a third “warm” zone by placing food farthest from the heat, just to keep it warm before serving. This technique is useful during parties or when cooking in batches.
How To Control Temperature On Different Grills
Every grill type has its own techniques for adjusting heat. Here’s how to manage them like a pro.
Gas Grill Temperature Control
- Preheat for 10–15 minutes so the grates are hot and even.
- Adjust burner knobs to set high, medium, or low.
- Use fewer burners for indirect heat or roasting.
- Open the lid to cool down quickly; close to retain heat.
Example: Sear steaks with all burners on high, then move to a cooler side to finish cooking without burning.
Another tip: If your gas grill has multiple burners, stagger them—one high, one low, one off. This gives you a greater range of heat zones for different foods.
Charcoal Grill Temperature Control
- Control airflow with vents. Open vents give more oxygen for higher heat; close to lower heat.
- Adjust the amount of charcoal—more coals mean higher temperatures.
- Raise or lower the grate (if possible) to change the distance from the heat.
- Add wood chips for smoke, but don’t block vents.
Advanced tip: Use a two-zone fire—pile coals on one side for high heat, leave the other side empty for indirect cooking.
When cooking long recipes, add charcoal gradually. Some people dump all coals at the start, but this causes a spike in heat followed by a drop. Adding a handful every hour keeps temperature steady.
Pellet Grill Temperature Control
- Set the digital temperature—the controller does the rest.
- Keep the lid closed as much as possible to maintain steady heat.
- Clean out ash to prevent airflow blockages.
- Watch for pellet jams if the grill suddenly loses heat.
Pellet grills sometimes struggle in cold weather. If you notice temperature swings, check for drafts around the grill and keep the hopper dry.
Electric Grill Temperature Control
- Set the dial or button to your target temperature.
- Preheat before adding food.
- Avoid opening the lid too often, as heat escapes quickly.
For thicker cuts or slow cooking, use foil to tent the food, which helps hold heat and moisture.
Managing Flare-ups And Hot Spots
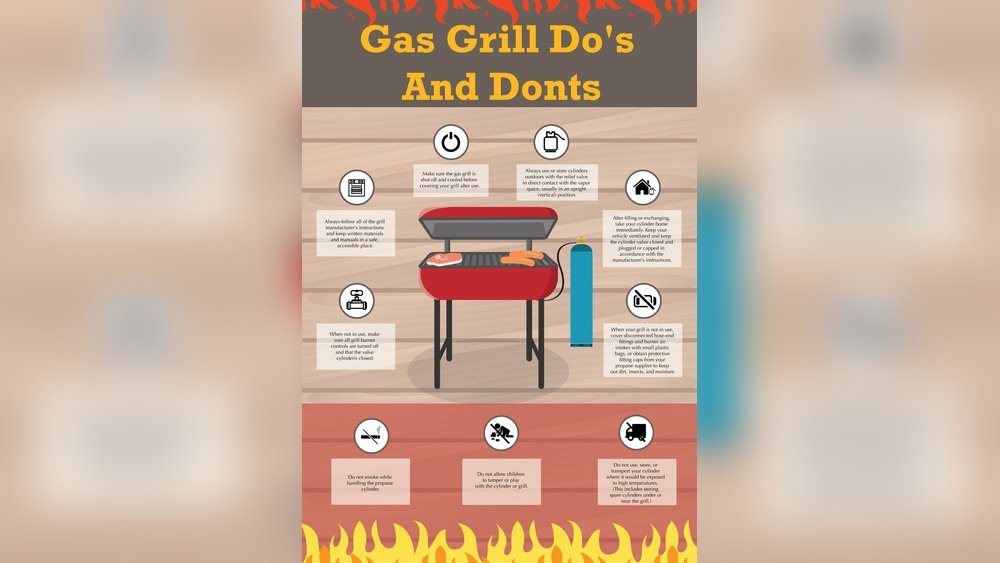
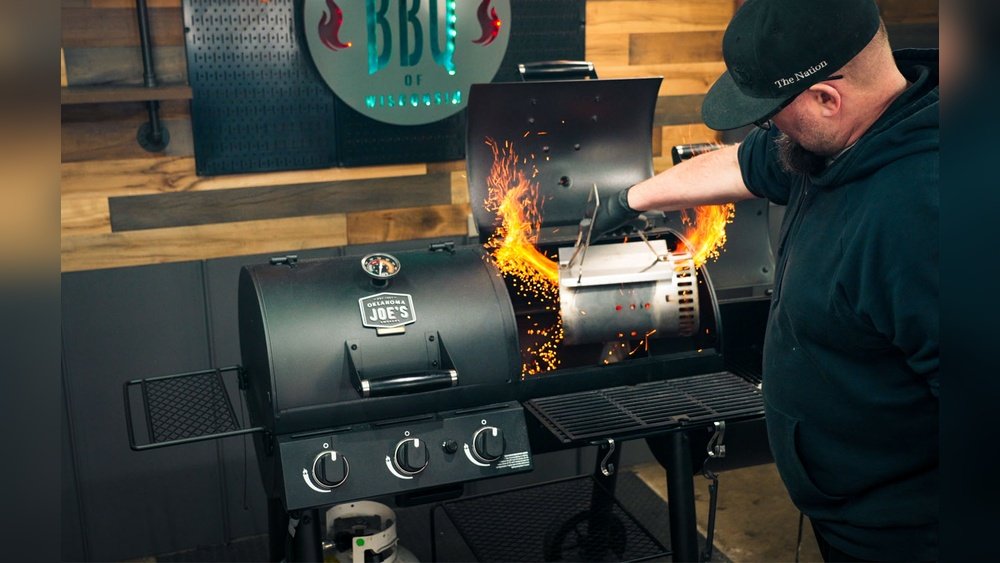
All grills can develop flare-ups (sudden flames) or hot spots (areas hotter than others). These can ruin food if not handled well.
Preventing Flare-ups
- Trim excess fat from meats.
- Keep a spray bottle of water handy.
- Don’t overload the grill with fatty foods.
If you see a flare-up, move food to a cooler zone or shut the lid briefly to cut oxygen. Never use water on a gas grill—just shift food or lower the burner.
Handling Hot Spots
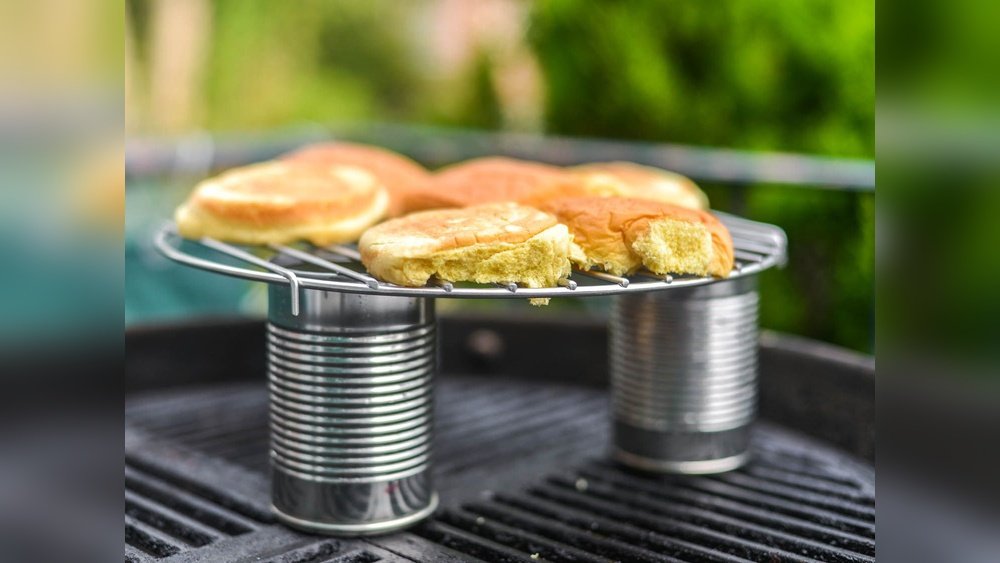
- Test your grill by placing bread slices across the grate and toasting for a few minutes. The darkest areas reveal hot spots.
- Move food around as needed, or rotate for even cooking.
Pro insight: Hot spots are not always bad. Use them to your advantage—sear in one area, finish in another.
Some cooks place thicker cuts on cooler areas and thinner cuts on hotter spots. This helps everything finish at the same time.
Credit: www.fogocharcoal.com
Setting And Maintaining The Right Temperature For Different Foods
Different foods need different grill temperatures. Here’s a guide for common BBQ items:
| Food | Grill Temp (°F) | Cooking Method | Internal Temp (°F) |
|---|---|---|---|
| Steak | 450–550 | Direct Sear | 130–145 (med-rare to med) |
| Burger | 400–450 | Direct Sear | 160 |
| Chicken Breast | 350–400 | Indirect Finish | 165 |
| Pork Ribs | 225–275 | Indirect, Low & Slow | 190–205 |
| Fish | 350–400 | Direct/Indirect | 145 |
| Vegetables | 350–450 | Direct Sear | N/A |
If grilling mixed foods (like chicken and veggies), start the meats first, since they need longer and lower heat. Add vegetables later over higher heat so everything finishes together.
Advanced Temperature Control Techniques
Even experienced grillers can improve with these advanced tricks:
Reverse Searing
Start thick steaks or chops on indirect heat (low temp) until nearly done, then finish with a high-heat sear. This gives a perfect crust without overcooking the center.
Reverse searing also works for pork chops and lamb. Use a probe thermometer to check internal temp before moving to the hot side.
The Snake Method (charcoal)
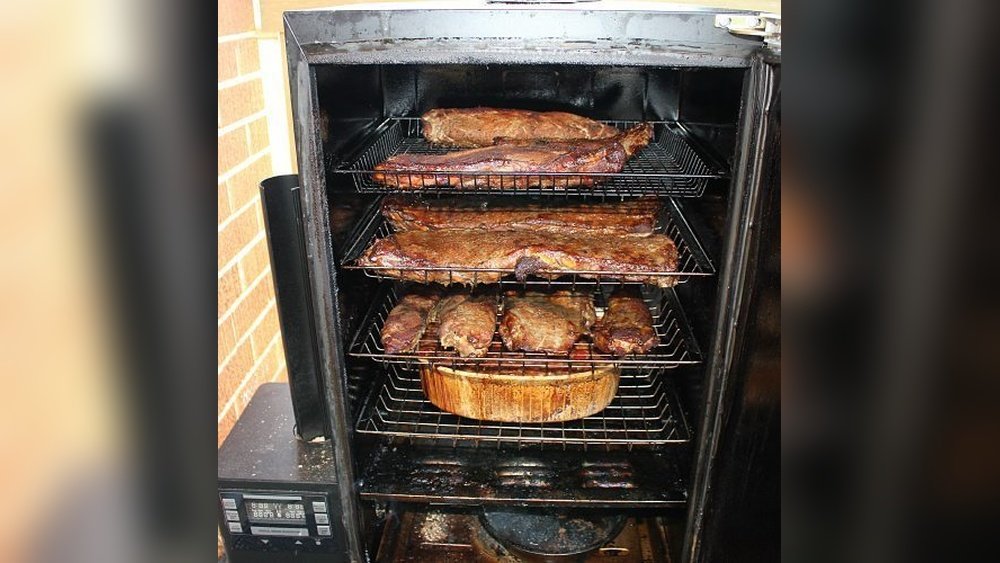
Arrange charcoal in a curved line (like a snake) around the edge of the grill. Light one end—heat moves slowly for 4–8 hours. Great for brisket or pork shoulder.
For extra flavor, add wood chunks at intervals along the snake. Each chunk releases smoke as the fire moves, giving steady flavor.
Using Water Pans
Place a pan of water under the grate for low-and-slow cooking. This stabilizes temperature and adds moisture, preventing dry meat.
Water pans also help prevent sudden spikes in heat by absorbing excess energy. For longer cooks, refill the pan every hour.
Rotisserie Cooking
Rotisserie attachments turn meat slowly over indirect heat, cooking evenly and keeping juices inside.
For best results, balance the meat on the rod and use a drip pan below. Rotisserie is ideal for whole chickens, roasts, and even pineapples.
Using Grill Stones Or Plates
Ceramic stones or steel plates help absorb and spread heat, reducing hot spots and flare-ups.
Grill stones are especially useful on gas grills, which can have uneven burner performance. Place the stone above burners to even out the heat and prevent burning.
Common Grill Temperature Control Mistakes
Learning from others’ mistakes saves time and frustration:
- Ignoring preheating: Food sticks and cooks unevenly if grates aren’t hot.
- Trusting lid thermometers: They’re often inaccurate—measure at the grate.
- Opening the lid too often: Heat escapes, and food takes longer.
- Stacking food tightly: Crowding blocks airflow and creates steam, not sear.
- Not resting meat: Juices run out if you cut too soon after grilling.
Another mistake is not adjusting for weather. Cold or windy days demand more fuel and longer preheating. Many people forget to account for this and wonder why their grill can’t reach the desired temperature.
Fuel Types And Their Effect On Temperature
The kind of fuel you use affects how your grill heats and holds temperature.
Charcoal: Lump Vs. Briquette
- Lump charcoal burns hotter and faster but gives less steady heat.
- Briquettes last longer and burn at a more even temperature.
For long cooks, use briquettes for steady heat. For quick searing, lump charcoal gives intense heat.
Wood Chips And Chunks
Adding wood chips or chunks gives extra smoke flavor and can change grill temperature. Use sparingly to avoid flare-ups.
Some grillers soak wood chips in water before adding. This releases smoke more slowly and prevents sudden temperature jumps.
Gas: Propane Vs. Natural Gas
Both work well, but propane burns hotter. Natural gas is cheaper if you grill often, but installation costs more.
If you use a propane tank, check levels before every cook. Running out mid-cook can ruin your meal.
Pellets
Different wood pellet flavors (hickory, apple, mesquite) change smoke and burn rate. Always use food-grade pellets for safety.
Pellets stored in a humid area can absorb moisture, causing jams or uneven burning. Keep pellets dry for best results.
Practical Tips For Better Temperature Control
Here are simple yet powerful actions you can take right away:
- Keep the lid closed unless you need to check food. This keeps heat steady.
- Let meat rest after grilling for juicy results.
- Clean grates and vents often—blockages change airflow and temperature.
- Use a grill mat or foil for delicate foods to prevent burning.
- Have a safe area for flare-ups—move food away from sudden flames.
- Monitor weather: Wind, cold, or rain can lower grill temperature. Adjust fuel or settings as needed.
Also, if you’re grilling for a crowd, plan ahead. Start with indirect heat for thick cuts, then finish over direct heat for a quick sear. This keeps food juicy and prevents burning.
Visual Guide: Temperature Control In Action
Here are three images that show key temperature control steps:
*This image shows a classic two-zone charcoal setup for both direct and indirect cooking. *

*Here, a cook checks doneness with a probe thermometer, ensuring perfect results. *

*This gas grill uses multiple heat zones for versatile cooking. *
Comparing Popular Grill Thermometers
Not all thermometers are equal. Here’s a comparison of common types:
| Thermometer Type | Accuracy (+/- °F) | Reading Time | Best Use |
|---|---|---|---|
| Instant-read digital | 1–2 | 2–5 seconds | Checking meat doneness |
| Grill surface | 5–10 | 30–60 seconds | Measuring grate temp |
| Built-in lid | 10–50 | Continuous | General reference only |
| Infrared | 2–5 | Instant | Spot-checking surface |
Pro tip: For the most accurate results, use an instant-read digital thermometer for meat and a grill surface thermometer for the grate.
If you grill often, consider a dual-probe digital thermometer. One probe measures meat, the other tracks grill temp, making it easier to manage both at once.
Weather And Environment Impact On Grill Temperature
Outdoor grilling means dealing with changing weather. Here’s how to adjust:
- Wind: Can blow out flames or make charcoal burn too fast. Shield your grill if possible.
- Cold: Grills take longer to heat and lose temp quickly. Use more fuel and preheat longer.
- Rain/Humidity: Rain cools the grill; humidity can make it harder to reach high temps. Keep the lid closed as much as possible.
Little-known fact: Metal grills lose heat much faster in cold weather. Insulated covers or moving to a sheltered area helps keep temperatures steady.
If grilling in winter, bring food to room temperature before cooking. Cold food cools the grill, slowing cooking times.
Choosing The Right Grill For Temperature Control
If you’re buying a new grill, consider these factors:
- Type of temperature control: Digital controllers (pellet grills) are easiest. Vents and dampers (charcoal) offer the most flexibility but require more attention.
- Size and shape: Larger grills hold heat better but take more fuel. Kettle shapes are versatile for both direct and indirect heat.
- Build quality: Thick metal holds temperature better and resists weather changes.
Mistake to avoid: Buying a grill that’s too large for your needs. It wastes fuel and is harder to control for small meals.
Look for grills with adjustable grates or multiple burners. These features make it easier to create heat zones and manage temperature.
Smart Grilling: Using Technology For Better Control
Modern grills and gadgets take guesswork out of temperature management:
- WiFi thermometers: Let you monitor meat and grill temp from your phone.
- Automatic fans: Attach to charcoal grills to control airflow and keep steady heat.
- App-connected pellet grills: Let you adjust temperature without leaving your chair.
Check out this resource for more on smart grilling: Barbecue Grill – Wikipedia.
Some smart thermometers alert you when food is done, or when temperatures drop unexpectedly. This is helpful for long cooks or busy BBQ parties.

Credit: www.amazon.com
Cleaning And Maintenance For Consistent Temperature
A dirty grill is harder to control. Grease, ash, and blockages can cause flare-ups and uneven heating.
- Scrape grates after each cook to remove food bits.
- Empty ash from charcoal grills regularly.
- Clean burner tubes on gas grills to prevent uneven flames.
- Check for leaks in gas lines—bubbles in soapy water indicate a leak.
Unexpected benefit: A well-maintained grill uses less fuel because heat is not wasted.
Also, inspect grill seals or gaskets if your grill has them. Leaks let heat escape and make temperature control harder.
When To Upgrade Your Grill Or Thermometer
Sometimes, temperature problems are due to old or faulty equipment.
- Replace thermometers if they’re consistently inaccurate.
- Upgrade grills if you want easier control or more consistent results.
- Add accessories like heat diffusers, stones, or smart thermometers for better performance.
If your grill’s metal is thin and warping, it’s time for a new one. Warped grills lose heat and cook unevenly.
Frequently Asked Questions
What Temperature Should I Use To Grill Chicken Safely?
Chicken should be grilled at 350–400°F and reach an internal temperature of 165°F. Use indirect heat for thicker pieces to prevent burning the outside while fully cooking the inside.
How Do I Fix Hot Or Cold Spots On My Grill?
Move coals or adjust burner settings to balance the heat. Use a grill stone or rotate food regularly. Testing with bread slices helps you find and manage uneven zones.
Can I Control Grill Temperature Without A Thermometer?
You can use the “hand test”—hold your hand 5 inches above the grate. 2 seconds = high heat, 4 seconds = medium, 6 seconds = low. However, using a thermometer is far more accurate.
Why Does My Grill Lose Heat When I Open The Lid?
Opening the lid lets heat escape, especially in cold or windy weather. Only open when necessary, and close quickly to keep temperature steady.
Is There A Way To Add More Smoke Flavor Without Raising Temperature?
Yes! Add a small packet of soaked wood chips to your grill. Keep vents partly closed to trap smoke but not enough to snuff out the fire.
Final Thoughts
Grill temperature control is the key to unlocking great barbecue—no matter the recipe or grill type. By understanding your grill, measuring accurately, and using the right techniques, you can serve food that’s not just good, but memorable. Practice, experiment, and don’t be afraid to adjust.
Soon, perfect steaks, tender brisket, and juicy chicken will be your new standard. Happy grilling!